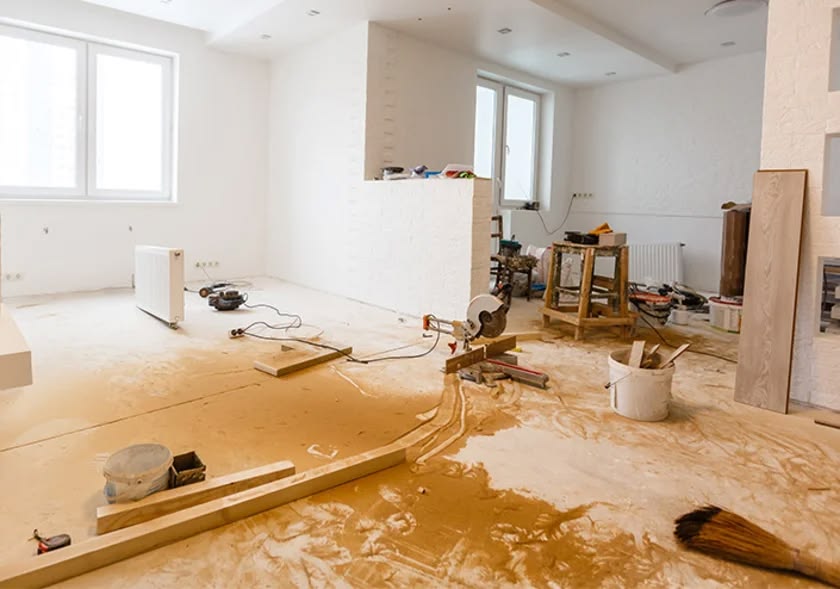
The Ultimate Post-Renovation Cleaning Guide: Extracting Fine Silica Dust, Chemical Odors & Construction Residue
Completing a home renovation, kitchen upgrade, or built-in wardrobe installation is an exciting milestone. However, stepping into a freshly renovated space reveals an immediate challenge: microscopic construction dust.
Sanding drywall, cutting tile grout, and trimming custom wood cabinets generates massive quantities of fine silica dust (PM₂.₅ to PM₁₀ particles) and sawdust. In humid tropical environments (65% to 85% RH), airborne dust absorbs ambient moisture and settles as a sticky, abrasive micro-film over every surface—inside air conditioning blowers, behind cabinet hinges, and along window tracks.
Wiping dry construction dust with a soaking wet cloth creates a thick, cloudy mud smear that permanently ruins fresh paint sheens and scratches glass.
This comprehensive post-renovation restoration guide outlines a systematic top-to-bottom decontamination strategy to eliminate silica dust, strip grout haze, neutralize off-gassing paint VOCs, and make your home safe to inhabit.
Zone 1: HVAC, Air Conditioners & Ceiling Dust Extraction
Running your air conditioning unit while contractors are sanding drywall or cutting tiles draws airborne cement and gypsum dust directly into the indoor unit’s evaporator coils and blower fan.
1. The Post-Renovation Aircon Decontamination Protocol
Do NOT Turn On Aircons During Renovation: Seal indoor aircon units in plastic sheeting throughout the construction period.
Filter Extraction & Wash: Remove mesh filters, submerge them in warm soapy water, and brush away grey gypsum dust.
Chemical Coil & Blower Wheel Clean: Fine drywall dust mixes with moisture on cooling fins, forming an insulating cement-like crust. Inspect the internal blower wheel; if dust has caked between the fan blades, schedule a professional chemical coil wash before occupying the room.
Ceiling Fan Blades: Dust settles heavily on top of ceiling fan blades. Wrap a damp microfiber cloth around each blade and slide outward to catch dust without dropping it onto fresh floor tiles.
Zone 2: Wall-to-Wall Silica Dust Extraction & Built-In Joinery
Fine silica dust hangs in the air for hours before settling inside closed cabinet drawers, wardrobe tracks, and high light fixtures.
1. The "Top-to-Bottom" Gravity Rule
Always clean from the highest point in the room downward. Cleaning floors first means falling dust from ceiling lights and wall ledges will require you to re-mop the floor.
Ceilings & Crown Moldings: Use a long-handled dry microfiber mop to sweep ceiling corners, aircon ledges, and recessed L-box light troughs where sawdust hides.
Painted Walls (Dry Vacuum First): Attach a soft-bristle brush nozzle to a HEPA vacuum and vacuum painted walls vertically. Never wipe fresh construction dust with a wet towel initially—water turns gypsum dust into slurry that stains flat paint.
Switch Plates & Door Frames: Wipe door tops, architraves, skirting boards, and electrical switch plates with a micro-damp cloth.
Zone 3: Floor Restoration: Grout Haze, Paint Splatters & Tile Polishing
Newly tiled floors often look dull, chalky, or white-streaked after installation. This is caused by grout haze—a thin film of cementitious binder left behind when tile setters sponge off excess grout.
1. Removing Grout Haze
Cementitious Grout Haze: Wait 24 to 48 hours for new grout to cure. Mix 1 part white vinegar to 4 parts water (for porcelain/ceramic tiles only). Scrub tiles with a nylon pad to dissolve the alkaline cement haze, then rinse with clean water.
Natural Stone Tiles (Marble, Granite, Travertine): Do NOT use vinegar or acidic cleaners on marble or limestone! Acid etches natural stone permanently. Use a pH-neutral commercial grout haze remover designed for marble.
Epoxy Grout Haze: Epoxy grout requires specialized resin-stripping solvents. Standard water and vinegar will not dissolve cured epoxy film.
2. Stripping Paint Splatters & Silicone Residue
Porcelain & Ceramic Tiles: Hold a single-edge razor blade or heavy-duty scraper flat at a 15-degree angle against the tile surface. Lubricate the tile with soapy water and gently glide the blade under dried paint drops or silicone smears.
Vinyl & Engineered Timber Floors: Never use razor blades or harsh acetone on vinyl or timber. Dampen paint drops with 70% isopropyl alcohol, allow it to soften the latex paint for 2 minutes, and rub away gently with a plastic scraper.
Zone 4: Window Tracks, Glass & Fixture Restoration
Sliding window tracks act as catch-basins for mortar, plaster splatters, and sawdust during exterior wall masonry work.
1. Deep Cleaning Window Tracks
Dry Extraction: Vacuum loose grit out of narrow aluminum tracks using a crevice tool attachment.
Loosen Caked Mortar: Spray a mixture of warm water and dish soap into the track to soften hardened plaster or cement drops.
Detail Brush: Scrub track channels and drainage weep holes with a stiff nylon track brush or old toothbrush to restore smooth sliding movement.
2. Peeling Sun-Baked Protective Films
Window frames, stainless steel sinks, and laminate cabinet doors come wrapped in blue or clear polyethylene protective films.
Remove Within 14 Days: If left exposed to sunlight and tropical heat, the adhesive on protective tape degrades, baking onto aluminum and glass permanently.
Adhesive Removal: If tape leaves sticky glue behind, soak a cloth in citrus-based adhesive remover or isopropyl alcohol, press against the residue for 1 minute, and wipe clean.
Zone 5: Off-Gassing VOCs, Paint Fumes & Indoor Air Quality Reset
Freshly painted walls, custom lacquer finishes, cabinet adhesives, and timber varnishes release volatile organic compounds (VOCs) like formaldehyde and benzene into indoor air.
POST-RENO AIR DECONTAMINATION
1. The 48-Hour Cross-Ventilation Flush
Position Box Fans: Place standing fans near open windows facing outward to actively push air containing off-gassed chemicals out of the home.
Open Internal Cabinets: Leave all newly installed wardrobe and kitchen cabinet doors open during ventilation to allow trapped formaldehyde odors inside carcases to escape.
2. Activated Charcoal & HEPA Filtration
Activated Carbon Filters: Standard HEPA filters catch physical dust but cannot absorb gaseous paint VOCs. Deploy air purifiers equipped with thick activated carbon pellets to bind chemical fumes.
Bamboo Charcoal Pouches: Distribute 500g pouches of activated bamboo charcoal inside every new built-in closet and under-sink cabinet.
Master Post-Renovation Cleaning Matrix
| Area / Surface | Rough Clean (Contractor) | Deep Clean (Move-In Ready) | Key Tool / Chemical |
|---|---|---|---|
| Air Conditioning | Plastic wrap protection | Filter wash & coil inspection | HEPA Vacuum & Coil Cleaner |
| Walls & Ceiling | Sweep heavy cobwebs | Vertical HEPA vacuuming & damp wipe | Dry Microfiber Mop |
| Built-in Cabinets | Remove packaging wood | Remove drawers, vacuum tracks & wipe | Microfiber Cloth & Dish Soap |
| Tile Floors | Sweep plaster chunks | Strip grout haze & polish tile face | Vinegar (Porcelain) or pH-Neutral (Marble) |
| Window Frames | Remove tape wrappers | Scrub tracks & polish glass panels | Track Brush & Squeegee |
| Sanitary Ware | Flush pipe lines | Descale faucets & polish chrome | Microfiber & Limescale Cleaner |