Wall Care 101: Removing Scuffs, Crayon, Ink & Moisture Marks Without Stripping Paint
In humid tropical homes, interior walls face a relentless combination of high ambient moisture (often 65% to 85% RH), dust accumulation, and everyday household accidents. Moisture in the air softens water-based latex and emulsion paints, making them far more vulnerable to scuffing, staining, and peeling during cleaning.
Wiping a wall improperly—or using the wrong cleaning chemical on a delicate flat paint finish—can leave shiny burnished spots, permanently remove paint sheen, or create unsightly water rings.
This comprehensive guide covers how to clean painted walls, plaster, and wallpaper safely, removing everything from shoe scuffs and crayon artwork to grease splatters and humidity-induced water stains without damaging your paint layer.
Know Your Paint Finish Before You Clean
Before applying any liquid cleaner or damp sponge, identify the sheen level of your wall paint. The level of binder resin in the paint dictates how much scrub friction it can withstand.
| Paint Finish | Common Locations | Scrub Durability | Safe Cleaning Method |
|---|---|---|---|
| Matte / Flat Paint | Ceilings, bedrooms, living room walls | Very Low: Rubbing too hard strips paint or leaves shiny patches ("burnishing"). | Gentle dabbing with dry microfiber or micro-damp cloth; avoid harsh scrubbing. |
| Eggshell & Satin Paint | Hallways, children's bedrooms, dining rooms | Moderate to High: Has a soft sheen and resists mild moisture. | Mild dish soap solution with soft microfiber cloth; light melamine sponge use. |
| Semi-Gloss & Gloss Paint | Kitchens, bathrooms, doors, skirtings | High: Highly washable, moisture-resistant, and durable. | Soapy water, diluted vinegar, or mild degreasers with soft sponges. |
| Washable Interior Emulsion | High-traffic family homes | High: Formulated with stain-resistant resins. | Wipes clean easily with damp cloth and gentle soapy water. |
The Wall Restoration Toolkit
Having the right tools prevents abrasive scratching and color bleeding:
Microfiber Cloths (White or Light-Colored): Dyed cloths can transfer color onto light-colored walls when wet.
Melamine Foam Sponges (Magic Erasers): Act as ultra-fine sandpaper (micro-abrasive). Use only with light pressure.
Baking Soda Paste: A gentle, non-chemical abrasive for lifting oil and wax without stripping paint.
70% Isopropyl Rubbing Alcohol: Dissolves ink, permanent marker, and sticky adhesive residues.
Dishwashing Liquid (pH-Neutral): Cuts through body oils, fingerprints, and food splatters.
Two-Bucket System: One bucket for cleaning solution, one for clean rinsing water.
Zone 1: Everyday Scuffs, Furniture Rubs & Fingerprints
Furniture backs, door frames, and light switches accumulate body oils, grime, and dark rubber shoe marks over time.
1. Removing Dark Scuff Marks (Furniture & Shoes)
When rubber or plastic rubs against painted plaster, it deposits surface material onto the paint sheen.
The Tennis Ball Trick: For light rubber scuffs, rub a clean, dry tennis ball firmly over the mark. The felt texture lifts the rubber deposit off the paint without using water.
Damp Melamine Sponge: Wet a melamine sponge, squeeze out all excess water until it is merely damp, and lightly glide it over the scuff mark. Do not press hard—let the micro-porous foam do the work.
2. Degreasing Light Switches & Handprints
Skin oils left near light switches trap airborne dust, leaving yellow-brown patches.
Mix 1 teaspoon of pH-neutral dish soap into 1 liter of warm water.
Dip a microfiber cloth into the liquid and wring it out until it is nearly dry (prevents water from dripping into electrical outlets).
Wipe gently in a circular motion, then dry immediately with a clean dry towel.
Zone 2: Kids' Art Projects (Crayon, Pencil, Marker & Pen)
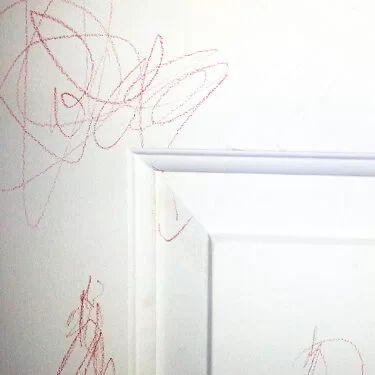
Children often treat living room walls as canvas. Because crayon wax, pencil graphite, and ink pigments have different chemical compositions, each requires a tailored removal strategy.
1. Wax Crayons
Heat & Lift: Hold a hairdryer on low heat about 10 cm from the crayon mark for 10 seconds. The warm air softens the paraffin wax. Wipe the softened wax immediately with a damp cloth soaked in soapy water.
Baking Soda Method: Dip a damp microfiber cloth into dry baking soda to create a mild abrasive paste. Gently rub the crayon lines in small circles until the wax lifts.
2. Graphite Pencil Marks
Do NOT start with water! Water turns graphite powder into a liquid gray smear that sinks into porous paint.
Use a clean white vinyl artist eraser or art gum eraser. Gently erase along the line. If faint marks remain, follow up with a damp melamine sponge.
3. Ballpoint Pen & Permanent Marker
Isopropyl Alcohol Dab: Dampen a cotton ball or microfiber pad with 70% isopropyl alcohol.
Blot, Don't Rub: Press the alcohol-soaked pad directly onto the ink mark for 5 seconds to dissolve the solvent base, then blot vertically. Rubbing back and forth spreads the ink laterally into surrounding paint pores.
Zone 3: Kitchen Splatters, Food Sauces & Oil Drops
Cooking oil splatters near dining areas or kitchen walls oxidize quickly in tropical heat, creating sticky yellow stains that attract dust.
1. Oily Curry & Sambal Splatters
Absorb Fresh Oil: If the spill is fresh, press a paper towel against the wall to absorb free-floating liquid.
Apply Warm Soap Solution: Sponge the area with warm water and a few drops of grease-cutting dish soap.
Neutralize Yellow Turmeric Stains: If turmeric leaves a bright yellow spot, mix equal parts baking soda and hydrogen peroxide (3%) into a thick paste. Apply to the stain, leave for 10 minutes, and wipe clean. Note: Test on an inconspicuous wall patch first to ensure colorfastness.
2. Coffee, Tea & Wine Splatters
Spray a solution of 1 part white vinegar and 2 parts water onto a microfiber cloth (never directly onto flat paint).
Tamp gently from the outer perimeter of the spill toward the center to avoid creating a faint water halo ring.
Zone 4: Humidity Stains, Condensation Lines & Water Damage
High indoor humidity can cause moisture to migrate through plaster walls, creating yellow water lines, chalky white deposits, and flaking paint layers.
1. Treating Yellow Water Rings & Condensation Lines
When water vapor condenses on cool concrete walls, it dissolves water-soluble minerals inside the plaster. As it dries, it leaves brown or yellow rings on the surface.
Clean the Surface: Wipe away surface dust with a diluted vinegar-water mixture (1:1 ratio) to stop mold spores.
Seal with Stain-Blocking Primer: Standard interior paint will not cover water stains—the yellowing will bleed right through new paint coats. Scrape off flaking paint, sand lightly, and apply an oil-based or shellac-based stain-killing primer over the mark before applying matching topcoat paint.
2. Dealing with Efflorescence (White Chalky Salt Lines)
Efflorescence appears as a powdery white substance on ground-floor masonry walls. It occurs when groundwater rises through concrete and evaporates, leaving mineral salts behind.
Brush Dry: Use a stiff nylon brush to sweep away dry salt crystals.
Do NOT use excessive water: Adding water redissolves the salts and pushes them back into the wall plaster, only to reappear when dry.
Seal from the Exterior: Efflorescence indicates a structural damp-proof membrane issue. Treat the exterior wall base with a water-repellent sealant to block rising damp.
Routine Wall Maintenance Schedule
| Frequency | Wall Care Action |
|---|---|
| Monthly | Dust high-level corners, light switches, and door frames using a dry microfiber duster. |
| Quarterly | Inspect kitchen-adjacent and bathroom walls for humidity spots or fine mold speckles; wipe with diluted vinegar. |
| Annually | Wash high-traffic hallway walls with warm soapy water; touch up chipped paint around baseboards. |